Editing Your Gantt Chart with AI
Natural-language project planning: type what you want to change and GanttTool's AI assistant updates your tasks, settings, dependencies, and more — instantly.
From Manual Clicks to Plain-English Commands
You have already built your Gantt chart. Tasks are in place, durations are set, dependencies are wired up. Now your project manager says: "Can you mark everything as complete and add a code review step after Backend Development?" Normally that means opening each task individually and changing fields one by one.
With GanttTool's AI assistant, you just type that instruction and press Apply. The assistant reads your entire project, understands the request in natural language, and returns a fully updated diagram in seconds.
New to GanttTool? If you haven't built your first chart yet, start with the step-by-step guide: How to Create a Gantt Chart Online. This article assumes you already have tasks in the editor.
What the AI Assistant Can Do
The AI assistant receives your full project data — every task, every setting — alongside your plain-English instruction. It returns a complete updated project. Here is a breakdown of what it can modify:
Task Operations
Add & Remove Tasks
Add new tasks, milestones, or phase separators anywhere in the list. Remove existing items by name. The AI assigns correct IDs automatically and never reuses existing ones.
Rename & Change Type
Rename any task, or convert it between types: regular task, milestone (zero-duration point), or phase separator. The AI preserves all other fields when only the name or type changes.
Timing & Duration
Change start types (project start, absolute date, after another task ends, before a task starts, at task start/end), update durations in days or weeks, set or clear end dates, and adjust day offsets between dependent tasks.
Dependencies
Add or remove task dependencies by referencing task names. The AI enforces the rule that a task can only depend on tasks that appear earlier in the list, preventing circular dependency errors.
Completion Percentage
Set completion (0–100%) on individual tasks or across all tasks at once. Useful for quickly reflecting a sprint retrospective or marking a phase as done.
Colors & Resources
Assign or change task colors (named colors like "red" or hex codes). Set resources on tasks — names, teams, or partial allocations like "Alice, Bob:50%".
Project Settings
The AI can also update your project settings in the same request. That includes the project title, project start date, time scale (daily / weekly / monthly), zoom level, whether weekends are closed, and the today-marker toggle. You can mix task and settings changes in a single instruction.
What the AI does not do: It does not generate diagrams from scratch without any tasks. If you want to start from a blank slate, add at least one placeholder task first, then describe your project in the AI panel. For a full walkthrough of creating a chart from zero, see the step-by-step guide.
Where the Panel Is and How to Use It
The AI assistant panel lives in the right-hand sidebar of the app, below the task list. Look for the ✨ AI Assistant section with an animated purple dot indicating it is active. Click the header to expand it.
Step-by-step
-
1
Open the AI Assistant panel by clicking the ✨ AI Assistant header in the sidebar. The panel expands to show a textarea.
-
2
Type your instruction in plain English. Be specific: reference task names exactly as they appear in your chart, and describe the change you want.
-
3
Click ✨ Apply or press Ctrl+Enter to send the instruction. The button shows a spinner while the AI processes your request (usually a few seconds).
-
4
Review the result. Your task list and settings update immediately. Click Generate Diagram to render the updated chart.
-
5
Not happy? Click ↵ Undo last AI edit (appears after any AI change) to revert to the state before the instruction was applied. Only the most recent AI change can be undone this way.
Keyboard shortcut: Ctrl+Enter inside the AI textarea submits your instruction without reaching for the mouse. Handy when iterating quickly.
Examples: Before & After
The best way to understand what the AI can do is to see it in action. Here are two real-world examples with before and after screenshots.
Example A: Mark All Tasks as Complete
You're closing out a project and want to record that all tasks are 100% done. Instead of clicking into each task and adjusting the completion slider, type one instruction:
The AI sets completion: 100 on every task simultaneously and returns the full updated project. Here is the result:
Before
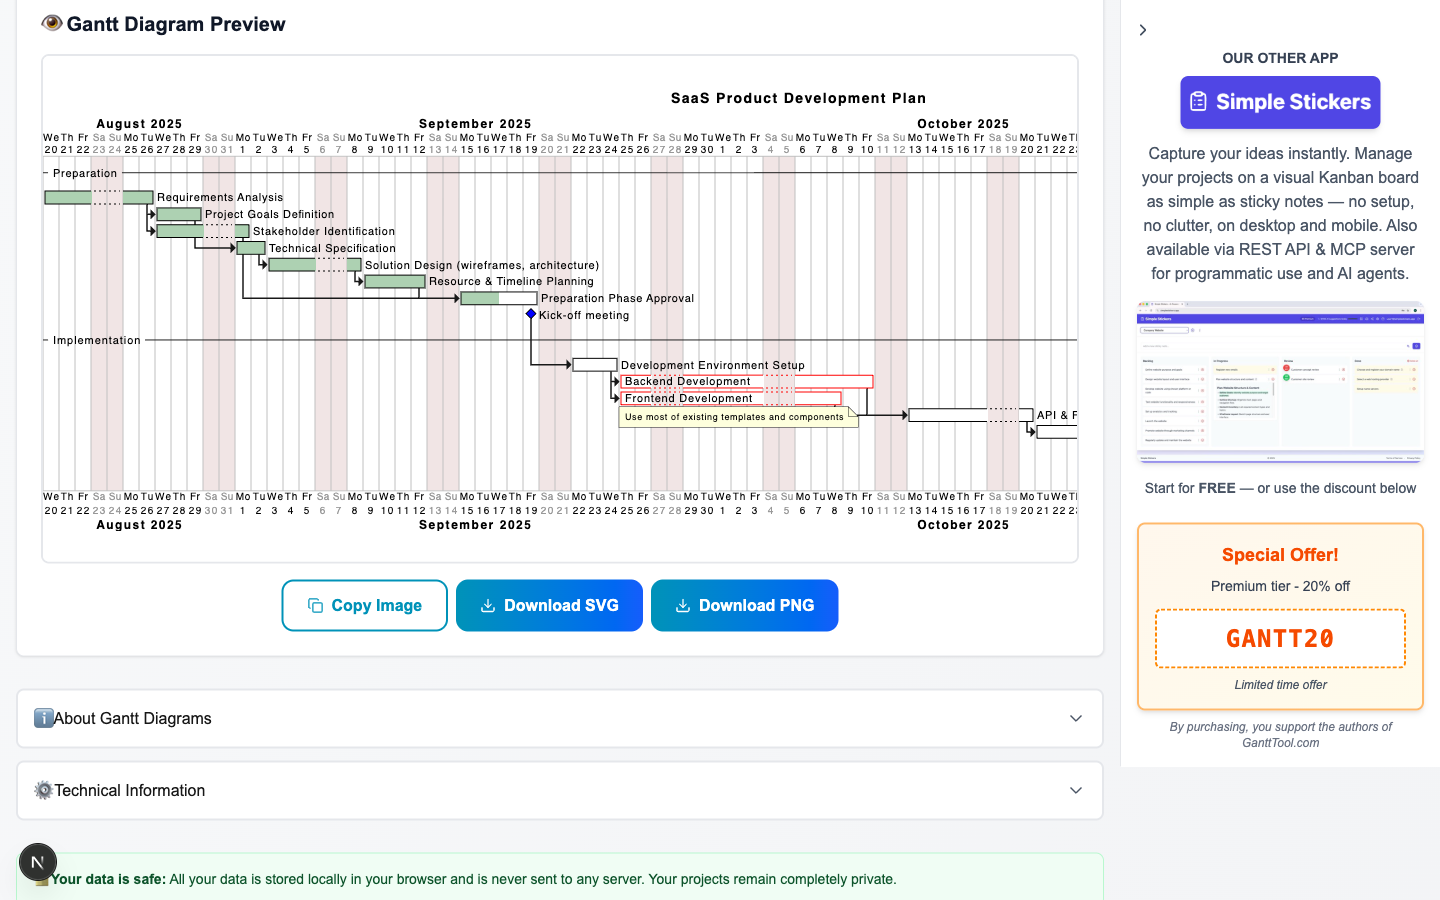
Tasks with 0% completion
After
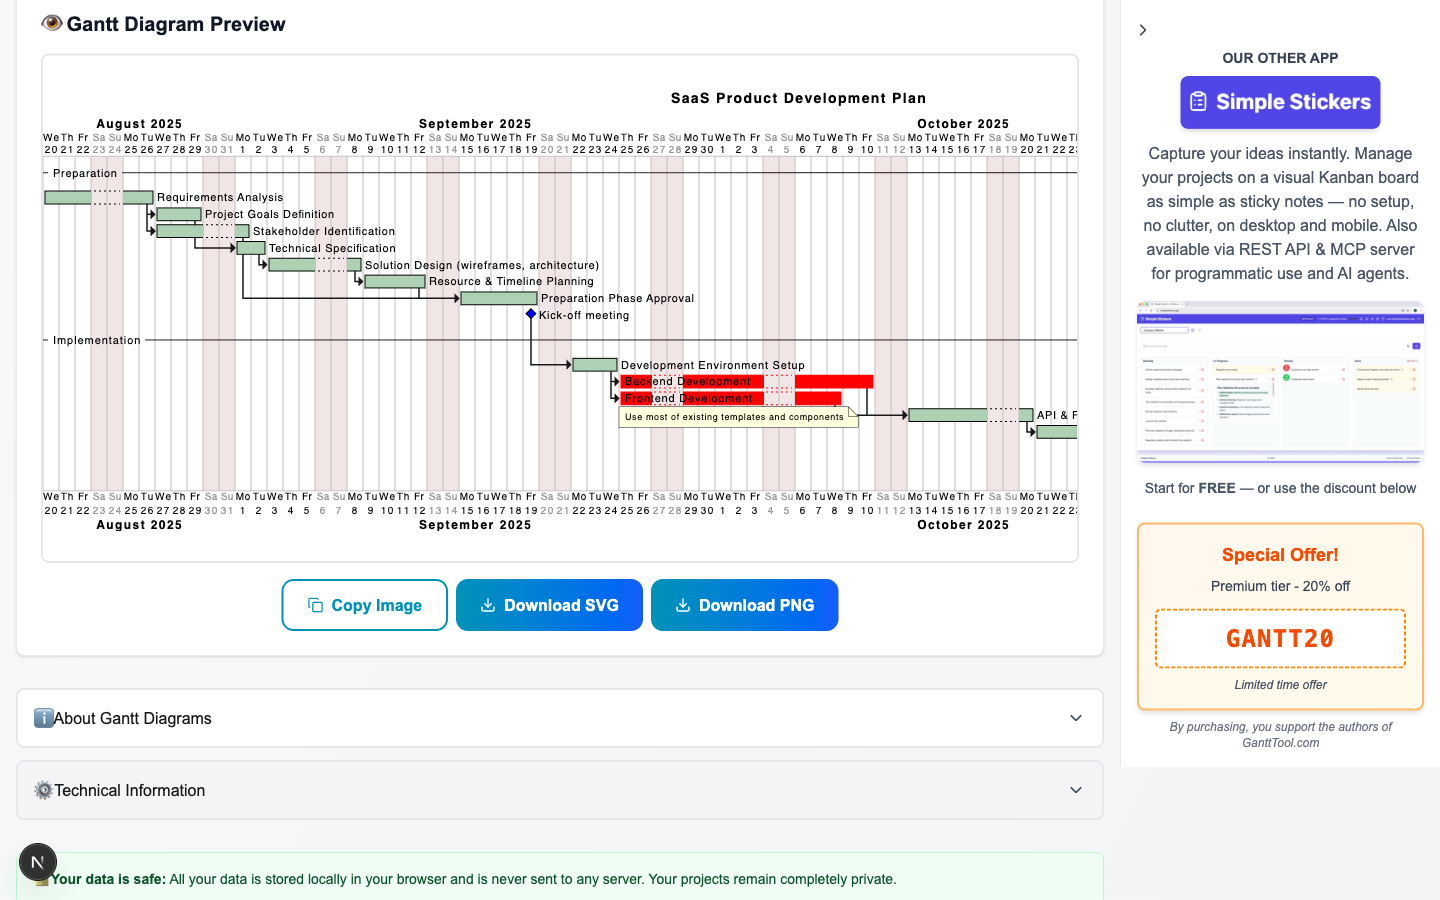
All tasks set to 100% complete
Example B: Add a Task After Another Task
Your tech lead asks you to insert a code review step into the plan right after Backend Development finishes. Type:
The AI inserts a new task with startType: "afterTaskEnd", linking it to Backend Development, and sets the duration to 3 days. All other tasks remain unchanged.
After — "Code Review" task added
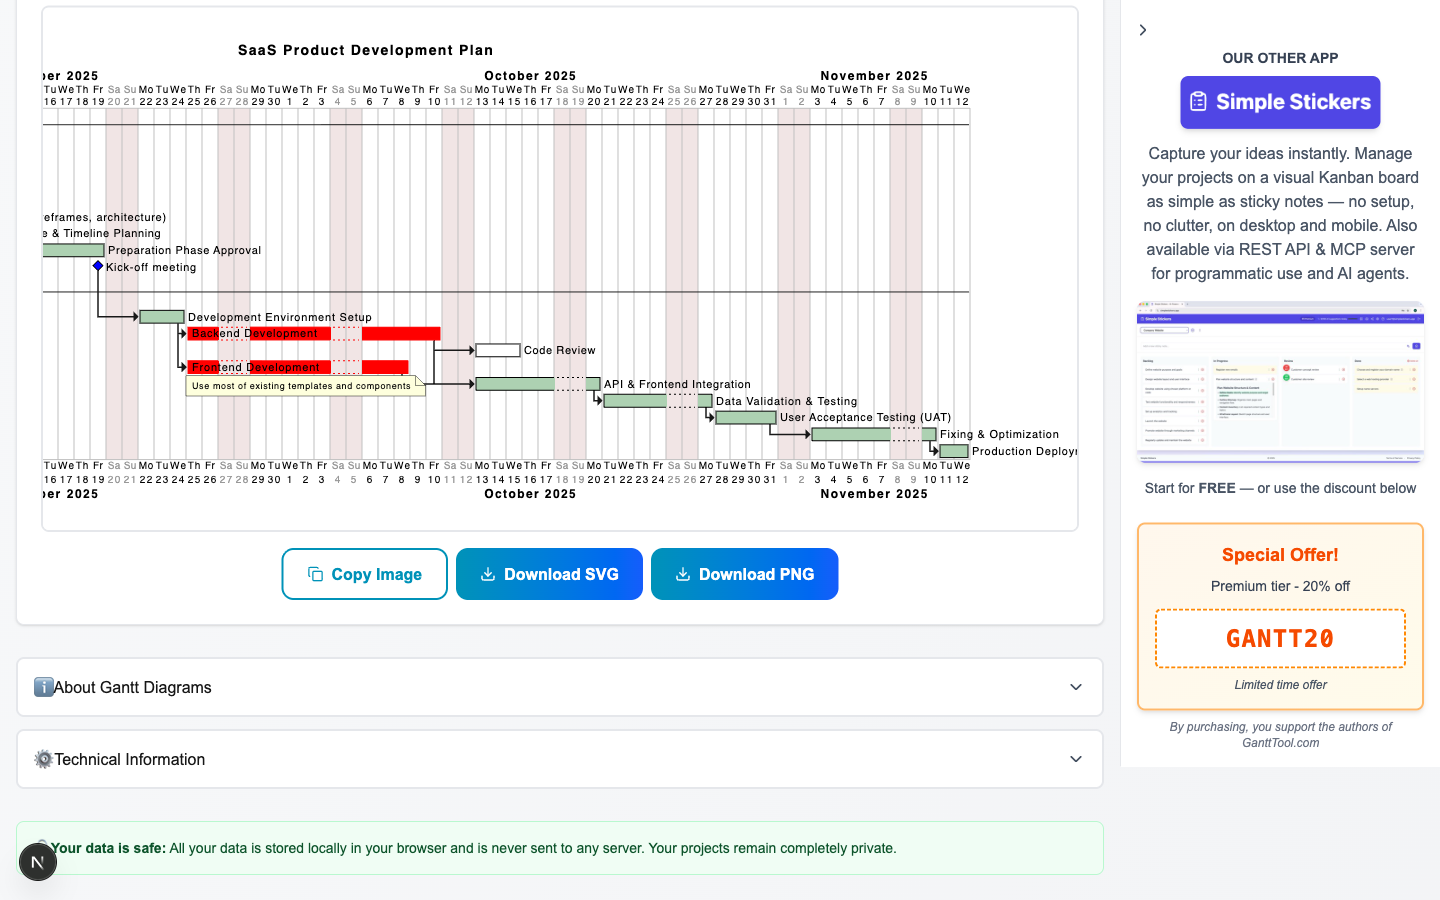
New "Code Review" task appears after Backend Development with the correct dependency
Notice: In both examples the AI preserved every other task exactly as it was — names, durations, dependencies, colors, and resources all stayed intact. Only the fields mentioned in the instruction changed.
Tips for Writing Effective Prompts
The AI understands natural language well, but a few habits make your instructions faster and more reliable:
-
1
Use exact task names. Write the task name exactly as it appears in the editor. "Backend Development" works; "the backend task" might not match if your task is named differently.
-
2
Be specific about timing. "Add a 5-day task" is clearer than "add a task for a few days." Include the unit (days or weeks) and the relationship ("after X ends", "starting on 2026-07-01").
-
3
Combine multiple changes in one prompt. You can say "Set completion to 75% on Design and 50% on Development, and change the project title to Q3 Launch." The AI handles multiple field updates at once.
-
4
Refer to "all tasks" for bulk changes. Phrases like "mark all tasks as 100% complete" or "set all task colors to blue" apply the change across the entire list efficiently.
-
5
Change settings in plain English. "Switch the time scale to weekly" or "disable closed weekends" work as-is — no need to open the Settings panel.
-
6
Use Undo if the result is unexpected. Click "↵ Undo last AI edit" immediately after applying. Then rephrase your instruction with more detail and try again.
More example prompts
Try the AI Assistant Now
The AI assistant is available in GanttTool for free — no account required. Open the app, load a demo project or add your own tasks, then scroll to the ✨ AI Assistant panel in the sidebar and type your first instruction.
- Edit tasks, milestones, and project settings in plain English.
- Apply changes with one click or Ctrl+Enter.
- Undo any AI change instantly if you want to try a different approach.
- Export the result as SVG or copy to clipboard as PNG.
Try the AI Assistant
Edit your Gantt chart in plain English — free, no account required. Type what you want to change and the AI handles the rest.
Open GanttTool — it's freeRelated Articles
What Is a Gantt Chart?
A complete guide to Gantt chart history, anatomy, waterfall methodology, and when to use them.
How to Create a Gantt Chart Online
Step-by-step tutorial for building a Gantt chart from scratch with GanttTool.
PlantUML Gantt Diagram Format
Deep dive into PlantUML syntax — tasks, milestones, colors, and advanced styling.